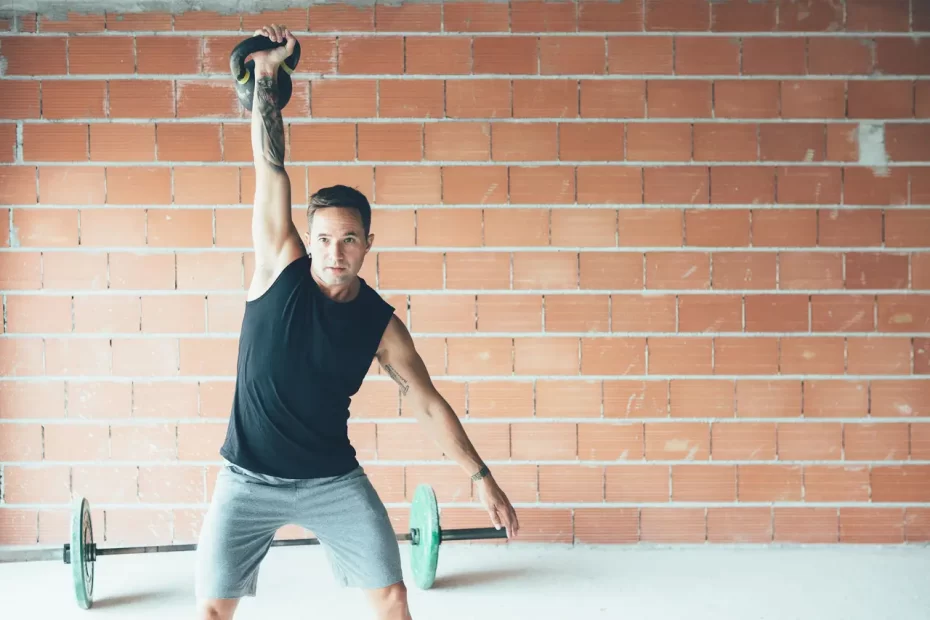
Windmill Kettlebell Exercise: Gao emphasizes the need for strong hip hinges and an active core in order to perform an effective windmill exercise, adding that doing it correctly also helps protect against injuries to shoulders, backs or hips by strengthening stabilizing muscles as your body turns around itself.
As you lower your body, check that your arm (which holds the kettlebell) remains directly overhead, not behind your shoulder.
Shoulders
The kettlebell windmill requires hinging at your hips while rotating your upper body while holding an empty kettlebell above your head, providing an effective move for developing shoulder stability and mobility. Incorporating this move into your workout regimen will enable you to develop skills to move beyond simple overhead positions to more challenging moves such as bent-arm windmills.
As Gao advises, beginners to the movement should begin with small weight and aim to complete three sets of eight to 10 reps with ease, gradually increasing it as their comfort with it increases and adding sets and reps to their training program to build muscle endurance.
Your windmill practice should involve practicing it either in front of a mirror, with guidance from a personal trainer, until you’re familiar with its basic form. Incorrect posture while performing the windmill may lead to various health issues including shoulder soreness or injury; one of the more frequent mistakes occurs when your arm holding the kettlebell goes behind your head instead of directly above it when performing hip hinge. Lower back muscles also tend to relax more than necessary which could cause excessive bending at waist level.
To avoid this from happening, be sure your back and core are engaged as you lower into each movement. Keep an eye on your kettlebell to ensure it remains in its locked-out overhead position, and avoid putting too much strain on your hips as you lower. Some individuals may need to bend their legs slightly as they lower themselves down but beware not forming an “U” shape when coming up from lower position.
When you’re ready to advance, try lowering the kettlebell by bending your elbow until it touches the floor. This requires less range of motion yet still works your shoulders and core muscles more intensely than with traditional windmill. Furthermore, this variation allows you to improve hip hinge strength while increasing shoulder mobility and stability – thus decreasing back discomfort.
Chest
Windmill exercises engage a range of muscles in your chest, back, abs, obliques and shoulders while using hip hinges to create stability. According to Gao, performing five windmills on each side can add this movement into workouts or you can increase sets and reps to build strength and endurance – just make sure that you use an appropriate weight for your level and abilities when selecting weight for this movement.
One common misstep during a kettlebell windmill is bending over with their spine instead of their hip hinge, placing extra stress and strain on their lower back and possibly leading to pain or injury. You can avoid this situation by making sure you’re squeezing your core tight while using hip hinges for movement.
Gao advises beginning windmill as a bodyweight exercise until you have mastered its mechanics, then progress to three sets of eight to 10 reps using light to moderate weights before gradually increasing them until your form improves and you maximize time under tension.
If the windmill seems daunting, try starting small: kneel on the floor with feet wider than hip-distance apart and bend both knees to about 90 degrees, as in lunging. Reach your right arm down toward the floor. If this seems manageable, progress to full standing windmilling by performing five lunged-up reps on one side before moving on to another.
Once you’re ready to advance to full windmilling, take a side view of yourself to ensure that your elbow is resting equidistant between two points on the ground in a straight line. Bend your leg slightly on the side where your arm is being lowered if necessary – just be mindful not to overdo it as doing so could decrease effectiveness and potential benefits from this movement.
Arms
Windmill kettlebell exercises require that you utilize your shoulder and arm muscles to brace and rotate as you slowly lower one arm over your head toward the ground. This movement helps build shoulder stability and enhance other functional exercises like Turkish get-up. In addition, strengthening core and stretching hips are added benefits of this movement. Even if it seems impossible to get all the way down with windmill kettlebell, don’t give up – with practice you will learn to brace your upper body and increase reach gradually over time.
If you’re having difficulty with the full windmill movement, Samuel recommends trying a bent-arm variation first. Bent-arm windmills still work the same muscles but with much shorter range of motion. They may be an appropriate alternative if shoulder issues prevent full overhead windmill movements from being achieved easily.
Beginning in a half kneeling position with your left foot planted firmly on the floor in windshield wiper fashion. Start holding the kettlebell opposite this planted foot with palm facing forward. Press kettlebell up overhead while keeping biceps close to chest and wrist flat against elbow; hinge at hips as torso lowers toward floor while keeping eyes locked onto kettlebell; trace left hand along outside left knee toward floor and return back to starting position using right leg still on ground for balance.
Avoid moving the kettlebell too high when performing the windmill exercise, which may lead to over-extension of your upper body and pain or injury. Also avoid dropping too low; doing so could result in poor form and execution of this movement.
Once you feel confident with the windmill movement, add it to your routine as part of a full workout or superset it with other movements, suggests Gao. Once comfortable with it, gradually increase weight and reps before honing technique and increasing time under tension.
Legs
As soon as you step foot in a gym, chances are you’ll see exercises like squats, deadlifts, bench presses, pull-ups and sit-ups. What you may not notice, however, is the windmill kettlebell exercise which combines hip hinge with shoulder press movements to strengthen core muscles, shoulders and arms while strengthening legs simultaneously.
The kettlebell windmill targets muscles in your upper back, shoulders and chest as well as in your legs – specifically the quadriceps and hamstrings. Additionally, this movement increases stability in both hips and knees by targeting adductor leg – an inner thigh muscle – alongside obliques and TFL (tensor fascia latae). These movements aid hip rotation and abduction which is necessary for tasks such as reaching over your head for something or cleaning behind furniture.
Exercise that requires strength and control to execute safely without incurring injuries such as shoulder, back or hip pain. If you’re not yet ready to attempt the full windmill move, start off slowly by performing a lateral version with a block placed at your feet to shorten its range of motion.
Once you feel confident with a lateral variation, progress to full windmill by taking steps such as removing the block from behind your front foot to extend its range of motion even further. This will challenge both core and hip muscles more than before so keep repetitions low to avoid fatigue or injury.
The kettlebell windmill exercise is an invaluable addition to any strength training program, as it develops overall strength while increasing mobility and stability in hips, legs, core and shoulders. Furthermore, functional training – which mimics real-world movements to increase performance in daily activities while decreasing risk – benefits greatly from practicing the windmill. For instance, practicing it will allow you to safely reach items off floors or over your head when cleaning or playing with kids.


